6.网络传输之Protobuf
约 896 字大约 3 分钟
2024-12-19
前面我们传输数据非常的麻烦,我们可以考虑用Json给数据包装一下,但在这里我们不使用Json,使用性能更好的Protobuf。 
一、下载protobuf
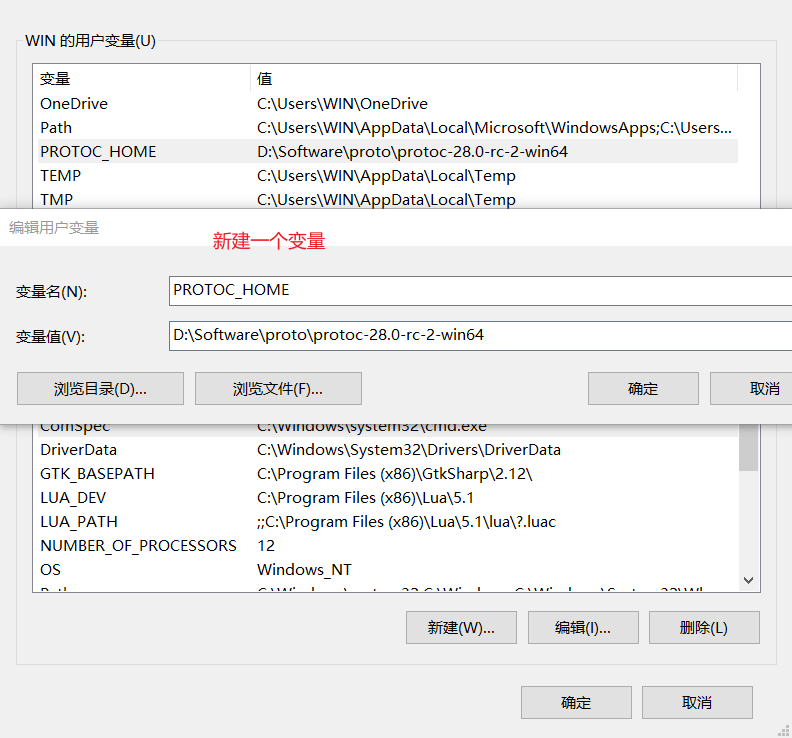
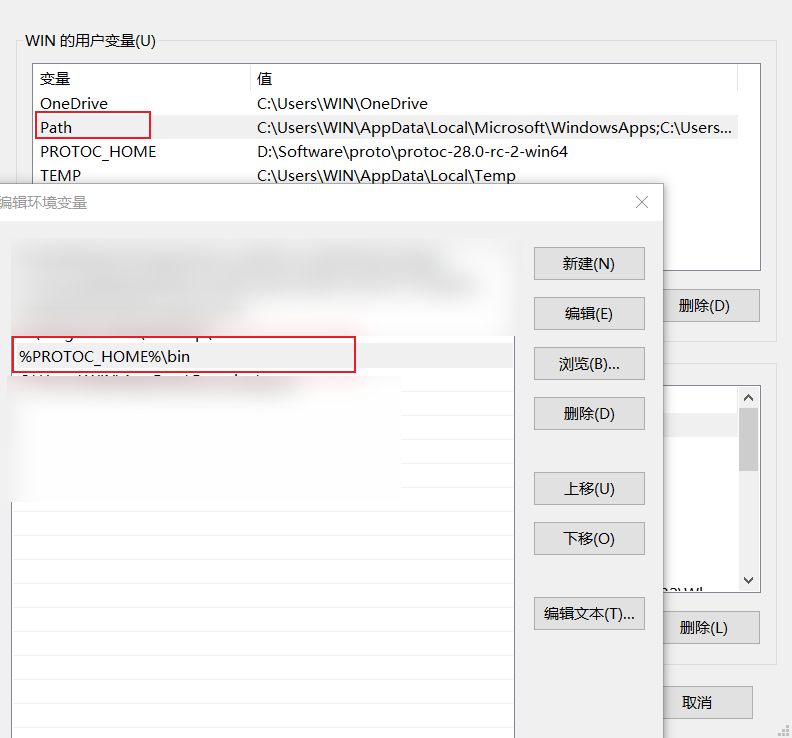
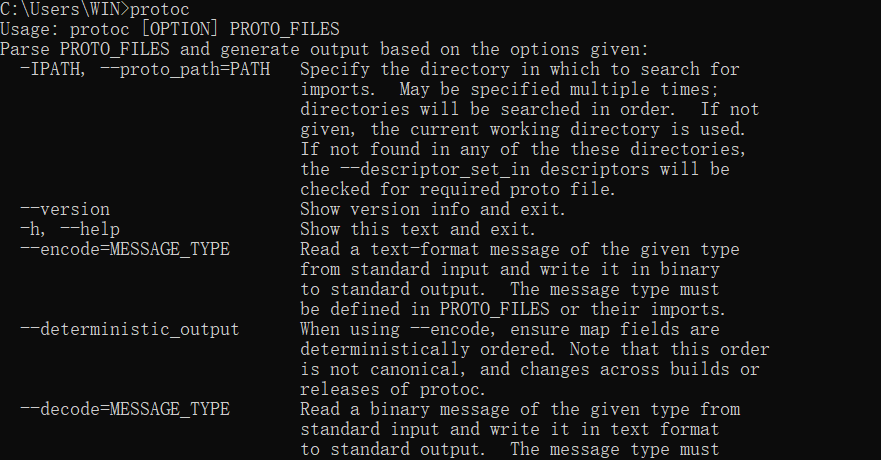
在这里下载protobuf,我下载了protobuf-28.0-rc2和protoc-28.0-rc-2-win64这两个。然后配置环境变量,能全局访问到protoc-28.0-rc-2-win64\bin\protoc.exe就行了。在命令提示符中输入protoc有反应就是成功了。
二、proto转c#
在Commit项目中创建 Proto/User.proto,proto相关的语法请自行学习。
syntax = "proto3";

message User {
    string name = 1;
    int32 id = 2;
    string password = 3;
}在LockStepServer项目中的Program.cs使用程序快速proto转c#,protoDirectory、outputDirectory分别为proto所在的文件夹和输出的c#所在的文件夹。
// .proto转换为csharp
static void Protobuf2Cs()
{
    string protoDirectory = @"C:\Users\WIN\Desktop\unityProject\LockStepServer\Commit\Proto"; // 替换为你的.proto文件目录路径
    string outputDirectory = @"C:\Users\WIN\Desktop\unityProject\LockStepServer\Commit\Proto\output"; // 替换为输出目录

    // 确保输出目录存在
    Directory.CreateDirectory(outputDirectory);

    // 获取所有 .proto 文件
    string[] protoFiles = Directory.GetFiles(protoDirectory, "*.proto");

    foreach (string protoFile in protoFiles)
    {
        ConvertProtoToCs(protoFile, outputDirectory);
    }

    Console.WriteLine("所有 .proto 文件已成功转换为 C#。");
}

static void ConvertProtoToCs(string protoFile, string outputDirectory)
{
    //protoc--csharp_out =.person.proto

    // 获取 .proto 文件所在目录
    string protoDirectory = Path.GetDirectoryName(protoFile);

    // 运行 protoc 命令
    var processStartInfo = new ProcessStartInfo
    {
        FileName = "protoc",
        Arguments = $"--proto_path=\"{protoDirectory}\" --csharp_out=\"{outputDirectory}\" \"{protoFile}\"",
        RedirectStandardOutput = true,
        RedirectStandardError = true,
        UseShellExecute = false,
        CreateNoWindow = true
    };

    using (var process = Process.Start(processStartInfo))
    {
        process.WaitForExit();

        string output = process.StandardOutput.ReadToEnd();
        string error = process.StandardError.ReadToEnd();

        if (process.ExitCode != 0)
        {
            Console.WriteLine($"转换文件 {protoFile} 时出错: {error}");
        }
        else
        {
            Console.WriteLine($"成功转换: {protoFile}");
        }
    }
}如果想要运行的话只需要把UdpServer.Start();注释掉,调用Protobuf2Cs方法就可以了。
static void Main(string[] args)
{
    // UdpServer.Start();
    Protobuf2Cs();
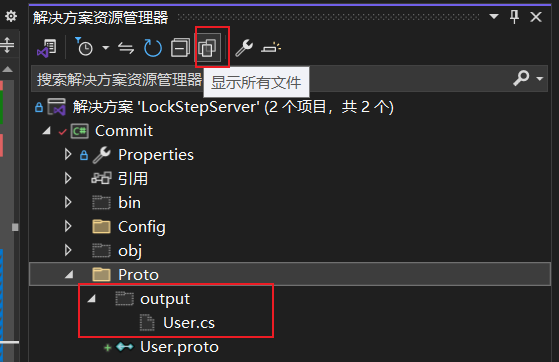
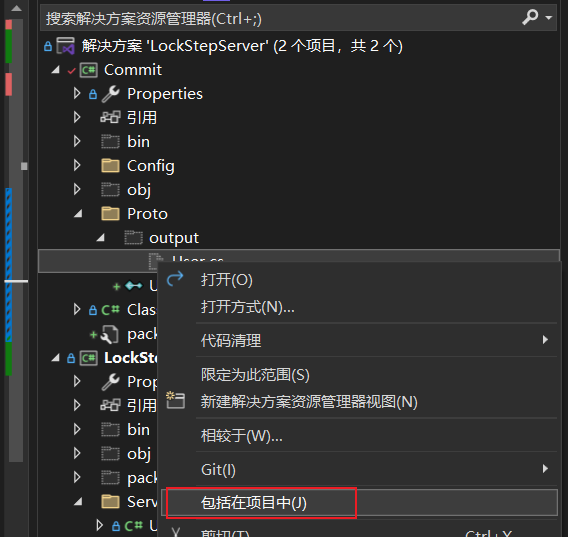
}在Commit项目中可以看到自动生成的cs文件(没看到需点击显示所有文件),然后右击选择包括到项目中。
三、导入protobuf
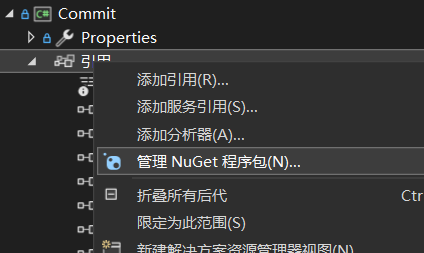
在Commit项目中右击引用 => 管理NuGet程序包 => 在浏览中搜索protobuf => 安装Google.Protobuf

四、使用protobuf
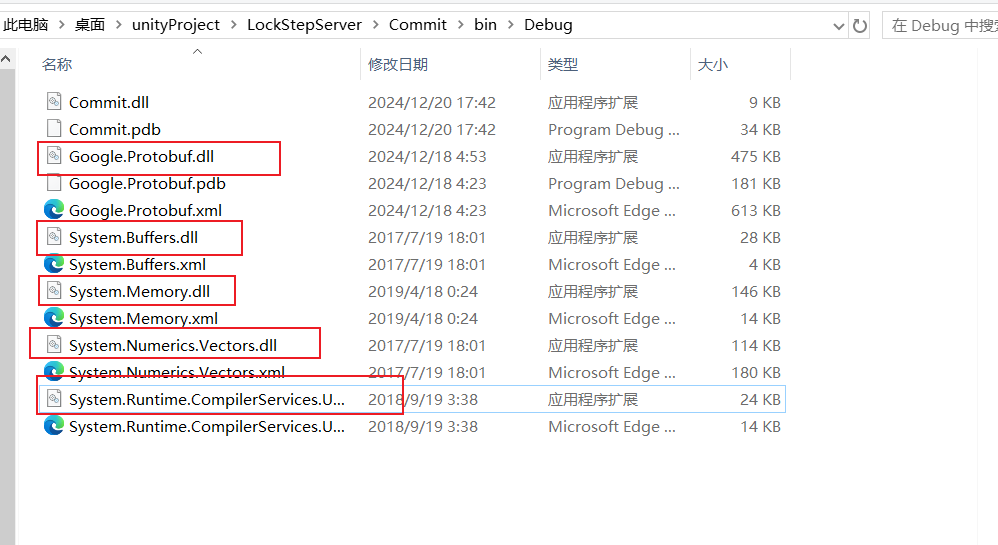
然后在Commit项目中右击重新生成,因为在Commit中用到了Protobuf,所以在LockStepServer中也需要导入Protobuf,这时候就可以在LockStepServer项目中使用user了。在unity中则需要重新导入Commit.dll文件,因为在Commit中用到了Protobuf(proto转C#),所以在Plugins中也需要导入protobuf相关的dll(除去commit.dll其它的所有dll)。
我们发送是把数据转换成byte[],而收到消息也是收到的是byte[],然后再转换成我们所收悉的数据类型。而在protobuf中可以把类转换成byte[],同样的也可以把byte[]转换成对应的类。而通过protoc把proto转换成的c#中里面就有方法做到相互转换。
private void Login(string userName, string password)
{
    User user = new User()
    {
        Name = userName,
        Password = password
    };
    byte[] msg = user.ToByteArray(); //  实体类 => byte数组
    udpClient.Send(msg, msg.Length, serverEndPoint);
}private static void HandleLoginMessage(byte[] loginInfo, IPEndPoint client)
{
//string[] strs = Encoding.UTF8.GetString(loginInfo).Split(' ');
User user = User.Parser.ParseFrom(loginInfo); // byte数组 => 实体类
string message = CheckLogin(user.Name, user.Password) ? "登陆成功" : "用户名或密码错误";
byte[] msg = Encoding.UTF8.GetBytes(message);
udpServer.Send(msg, msg.Length, client);
}当然,从server响应客户端也可以封装protobuf。